
Creating the budget for your wind tunnel project is a critical initial step. It involves factoring in various aspects. Beyond the wind tunnel's cost, you must allocate funds for construction, electrical connections, and your chosen location. The location expense may fluctuate based on leasing or purchasing. Additionally, you'll need to budget for essential items such as costumes, helmets, and visitor shoes, as well as other related costs. A comprehensive budget assessment is crucial for informed decisions when selecting the right wind tunnel. By considering all these elements, you can accurately determine the price range that aligns with your project's goals and financial capacity.
The FreeFly Technology project team is always ready to provide help and advice to our clients. To select the appropriate wind tunnel for your project, consider the following initial factors:
Project Goals: Determine your target audience for the wind tunnel. If you aim to attract first-time flyers, the FF250 is a suitable option. If your plans include both first-time flyers and professional athletes, the FF300 is a good fit. For those seeking a wide range of training opportunities and with ample capital to invest, the FF430 is worth considering.
Location Features: Each wind tunnel model comes with different dimensions and electrical power consumption requirements. Assess the feasibility of placing a wind tunnel in your chosen location by considering the following questions:
How much electrical power is available at the selected location?
What construction opportunities and limitations exist at the location for wind tunnel construction?
If you intend to construct a wind tunnel within a shopping or entertainment center, please send us a request with an attached building plan. Our engineers will assist in evaluating the feasibility of placing a wind tunnel.

Selecting the location for a wind tunnel is a critical task for ensuring the success of the entire project. We recommend siting the wind tunnel in cities with a large population and in locations with convenient transport accessibility. The ideal location should be in close proximity to entertainment venues, recreational areas, shopping centers, or entertainment complexes. Placing a wind tunnel inside a shopping mall is also a favorable option. When choosing a location for a wind tunnel, it's important to consider the overall dimensions of the wind tunnel. Downloading auxiliary information related to the specific model you're interested in can be of great assistance in determining the optimal location for your project.
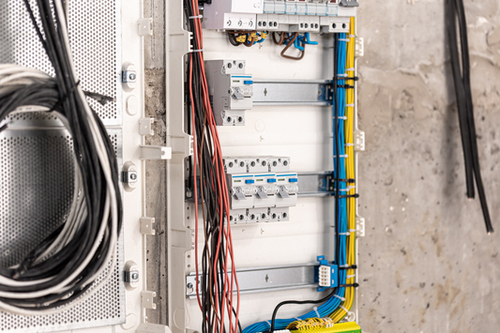
When analyzing the location, be sure to check the possibility of connecting the necessary electrical power. The wind tunnel can require anywhere from 320 to 2000 kW of electricity, depending on the model.
Using a generator as an alternative source of electricity for a wind tunnel is possible, but you have to consider the cost of the generator and the fuel for it. This can significantly increase the cost of flights and make the project unprofitable.
The easiest way to initiate a project with a wind tunnel is to place it in a working shopping or entertainment center or on the adjacent property, as the mall already has an electrical power source.

After you have selected the location and the appropriate model of the wind tunnel, we proceed to conclude a supply contract and initiate the manufacturing process. The production time falls within the range of 6 to 12 months, depending on the model, configuration, and any possible additions you have chosen for the wind tunnel.
Throughout the manufacturing process, we provide you with regular updates in the form of photo or video reports, showcasing the progress and readiness of your wind tunnel. You will receive such reports on a monthly basis.
Once all the components and details of your tunnel are prepared, we carefully pack them and place them in shipping containers. Each container is assigned a unique number, and a detailed list of contents is created for each one.
At this stage, the wind tunnel is fully prepared for transportation to the construction site.
The delivery of the wind tunnel is preplanned and depends on the location. Since the tunnel is packed in shipping containers, the cargo can be transported by rail, road, or sea.
Given the wind tunnel's value, we strongly recommend insuring it. Cargo insurance can usually be arranged by the customer, allowing you to select an insurance company you trust and secure the best price for your project budget.
FreeFly Technology wind tunnels are equipped with CE certificates. Depending on the country, local certification may be necessary, and it's the customer's responsibility to obtain these certificates.
Upon the wind tunnel's arrival at the installation site, it is essential to organize proper storage for its components. To assist with this, we provide guidelines for wind tunnel storage organization at the beginning of the manufacturing process.
A delivery and acceptance certificate is signed upon the cargo's arrival at the assembly site.

The assembly works of the wind tunnel are regulated by the installation supervision contract. This contract is signed simultaneously with the supply contract.
Our technical specialist is dispatched to your site to oversee the construction of the wind tunnel. Their objective is to ensure the proper assembly of the tunnel and to carry out on-site commissioning.
Upon contract signing, we provide a guideline that encompasses:
- A list of machines and equipment for assembly
- A list of workers and their qualification requirements
- Requirements for the site where the pre-assembly and assembly of the wind tunnel will take place
- A list of materials and tools necessary for assembly.
The delivery package with the wind tunnel includes a minimum set of materials for tunnel assembly. However, some materials will need to be procured at the assembly location.
Following construction, test launches of the wind tunnel are conducted to verify its correct operation. If everything functions properly, a certificate of acceptance of works is issued.
The construction timeline ranges from 2 to 6 months, contingent on the wind tunnel model. The construction schedule is outlined in the contract.
By the time the construction works are completed, the investor needs to prepare for the launch of the wind tunnel. Initiating operations is associated with the costs of equipment and software components, including:
-Suits, shoes, and helmets for flight
-Suits, shoes, and helmets for instructors
-Installation and configuration of an ERP system to manage customer flow, organize schedules, and account for income and expenses
-Finding and training instructors
-Preparing an advertising campaign to attract customers
When calculating the budget for a wind tunnel project, it is crucial to consider these costs. This will enable you to estimate the project budget most accurately during the preparation stage and reduce unexpected expenses. We recommend creating a comprehensive list of the necessary inventory at the project's outset and placing orders no later than 2 months before the completion of construction work.
This approach will allow you to start generating profits without unnecessary delays, and our team is prepared to provide recommendations for your project.

 ES
ES 中文
中文 DE
DE FR
FR